Password, two-factor authentication and passkeys
Sign in, reset a forgotten password, change it, turn on two-factor authentication, add a passkey, use Google, GitHub, Microsoft or GitLab, and read your sign-in history.
- 7 min read
- Updated October 13, 2026
You can get into your account in several ways, and you can use more than one: email and password, a passkey, or a Google, GitHub, Microsoft or GitLab account. Two-factor authentication adds a second step on top of the first way. Everything is managed in Settings → Security.
Signing in with your email and password#
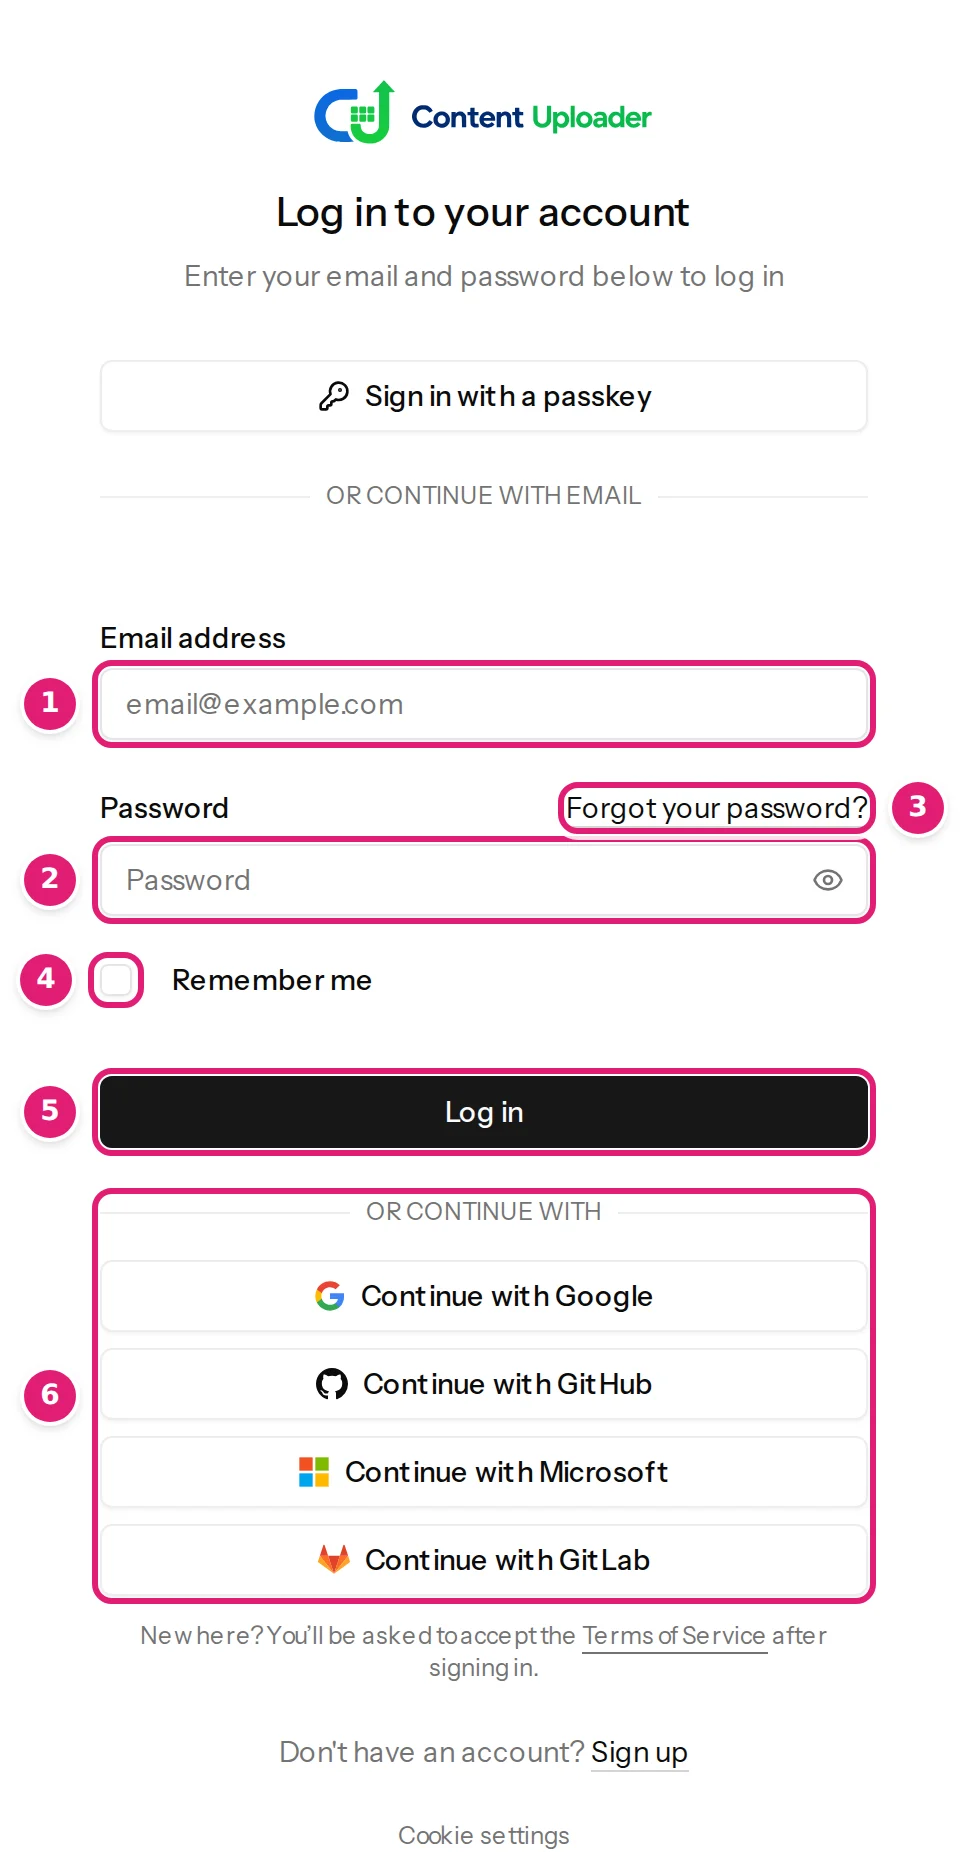
- Open the sign-in page and enter your Email address (1) and Password (2).
- Tick Remember me (4) if this is your own device.
- Select Log in (5).
If you have turned on two-factor authentication, a second page asks for the six-digit code from your authenticator app. It signs you in as soon as you have entered the sixth digit; Continue does the same if you prefer to select it. If you have lost the device, select the link to use a recovery code instead, which you confirm with Continue.
Too many attempts. Five sign-in attempts a minute are allowed for one email address from one connection. After that the server refuses the attempt, and the sign-in page does not say so: Log in seems to do nothing, even with the right password. Wait a minute and try again. The same limit protects the two-factor code.
A locked account. If an operator has locked your account, the sign-in page says This account is locked, so it cannot be used to sign in. and tells you to write to the support address, with a reference to quote. A lock is not something you can remove yourself. See support and feedback.
If you forgot your password#
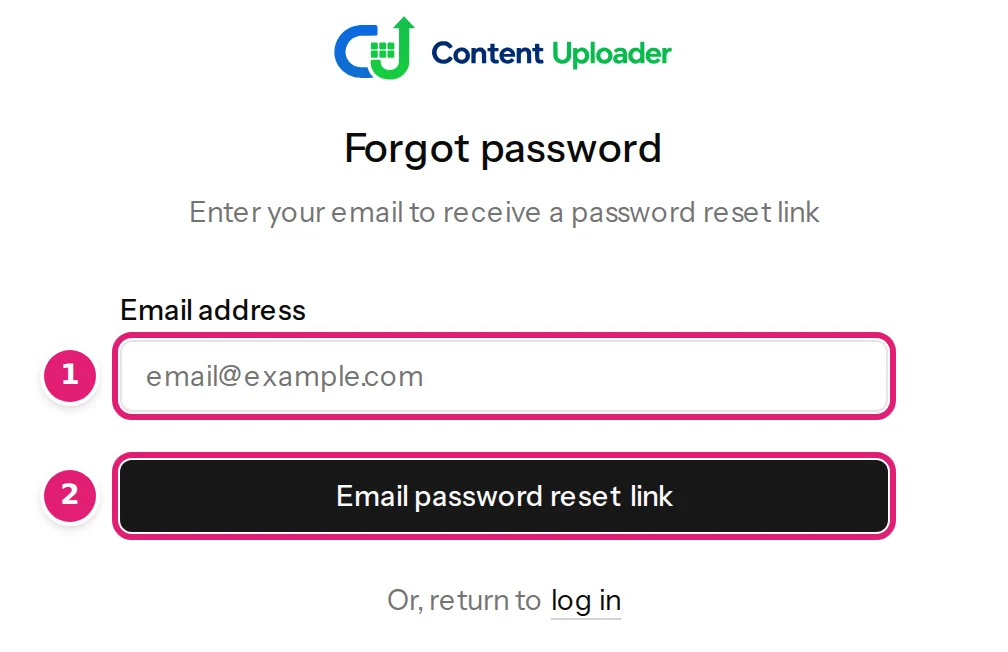
- On the sign-in page select Forgot your password?.
- Enter your email address and select Email password reset link. The page says We have emailed your password reset link.
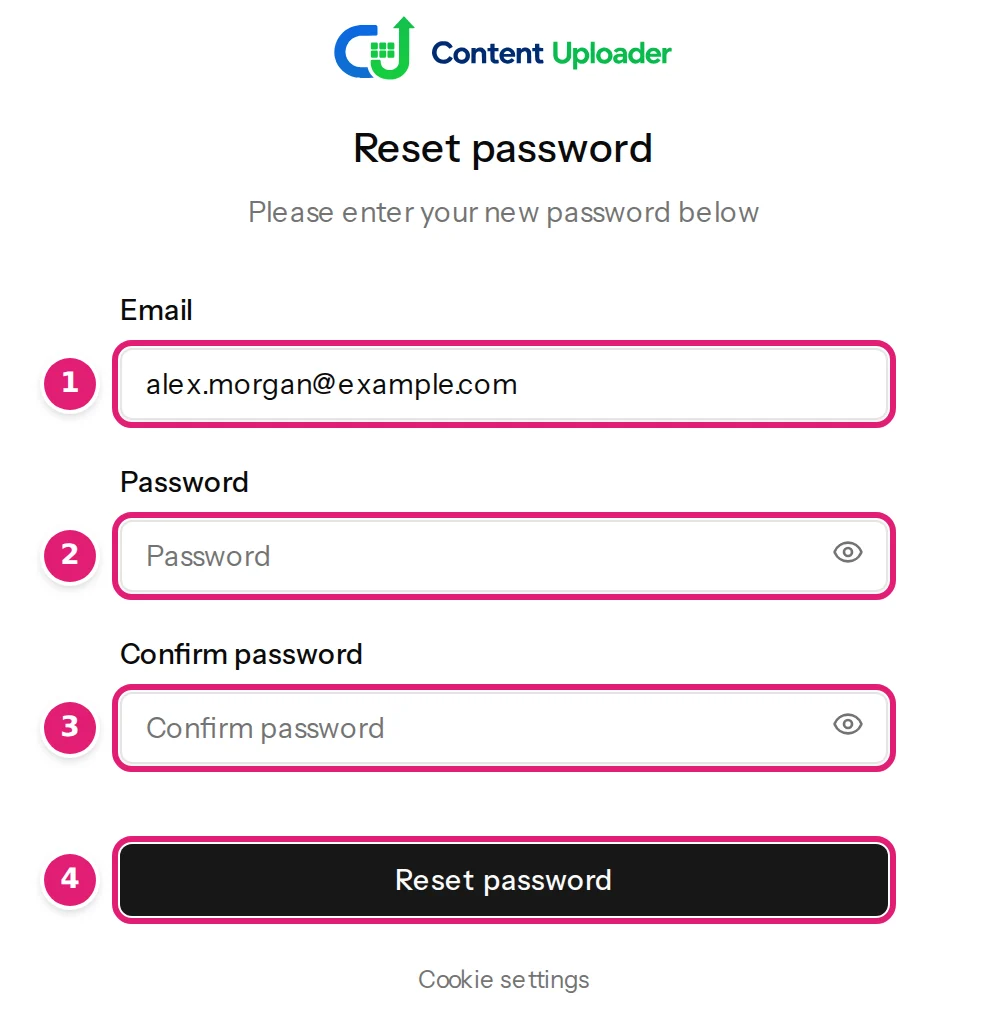
- Open the email and follow the link within 60 minutes. The Reset password page shows your address (it cannot be changed) and asks for a new Password and its confirmation. You can ask for a new link once a minute.
- Select Reset password, then sign in with the new password.
Password rules#
On the live service a new password must have at least 12 characters, with upper and lower case letters, numbers and symbols, and must not be one that is known from data breaches. Your browser's password manager can generate one that fits. The rule applies when you sign up, when you reset a password and when you change it.
Changing your password#
-
Open Settings → Security. The app asks you to confirm your password first (and again after three hours).
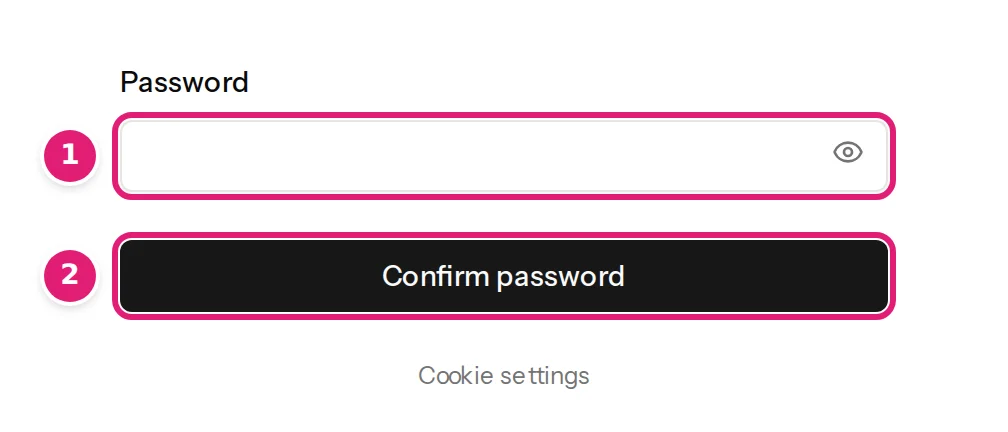
A recent password confirmation protects the page that controls how you sign in. -
In Update password, enter your Current password (1), the New password (2) and the confirmation (3), then select Save.
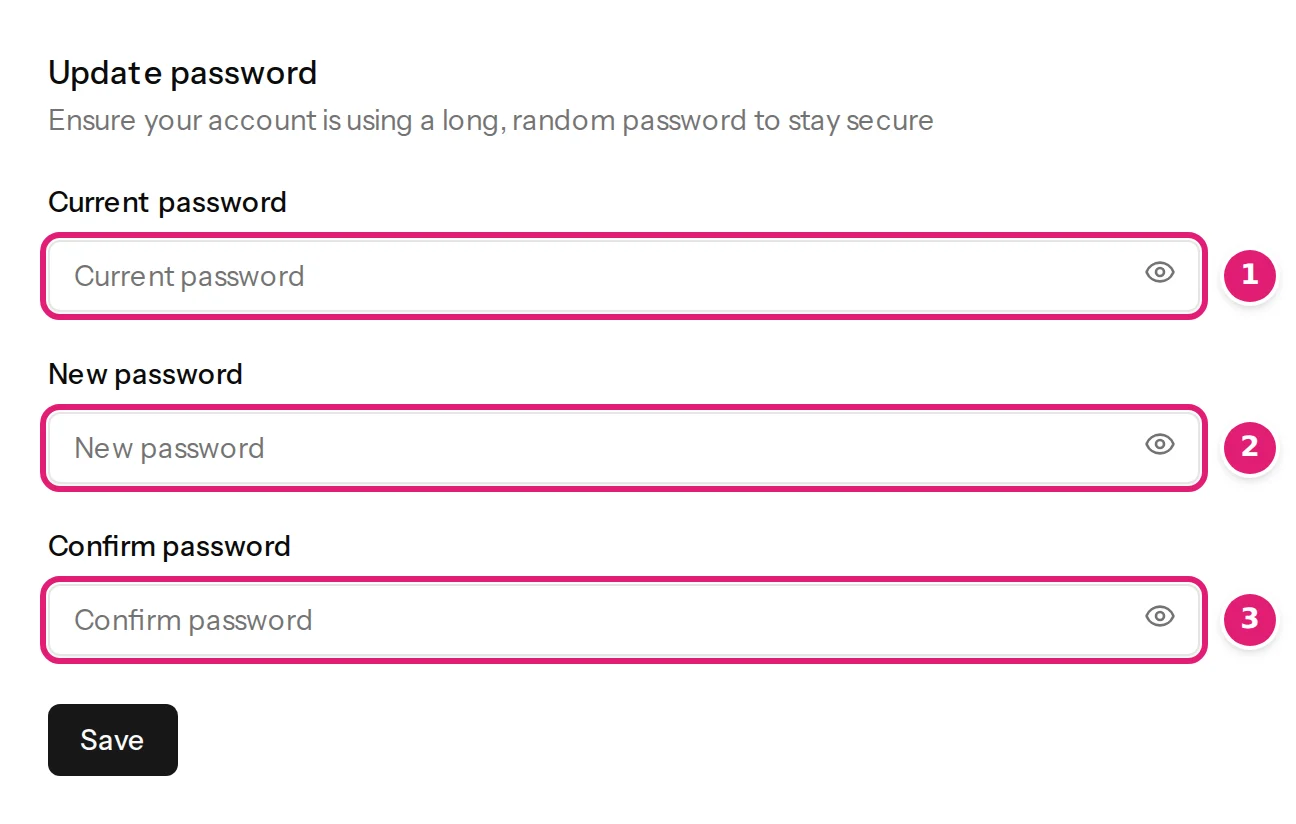
If you signed up through a provider and never set a password, the form is titled Set a password and has no Current password field: A password gives you another way in.
Two-factor authentication#
Two-factor authentication asks for a six-digit code from an authenticator app on your phone (any app that supports time-based one-time passwords, TOTP) each time you sign in.
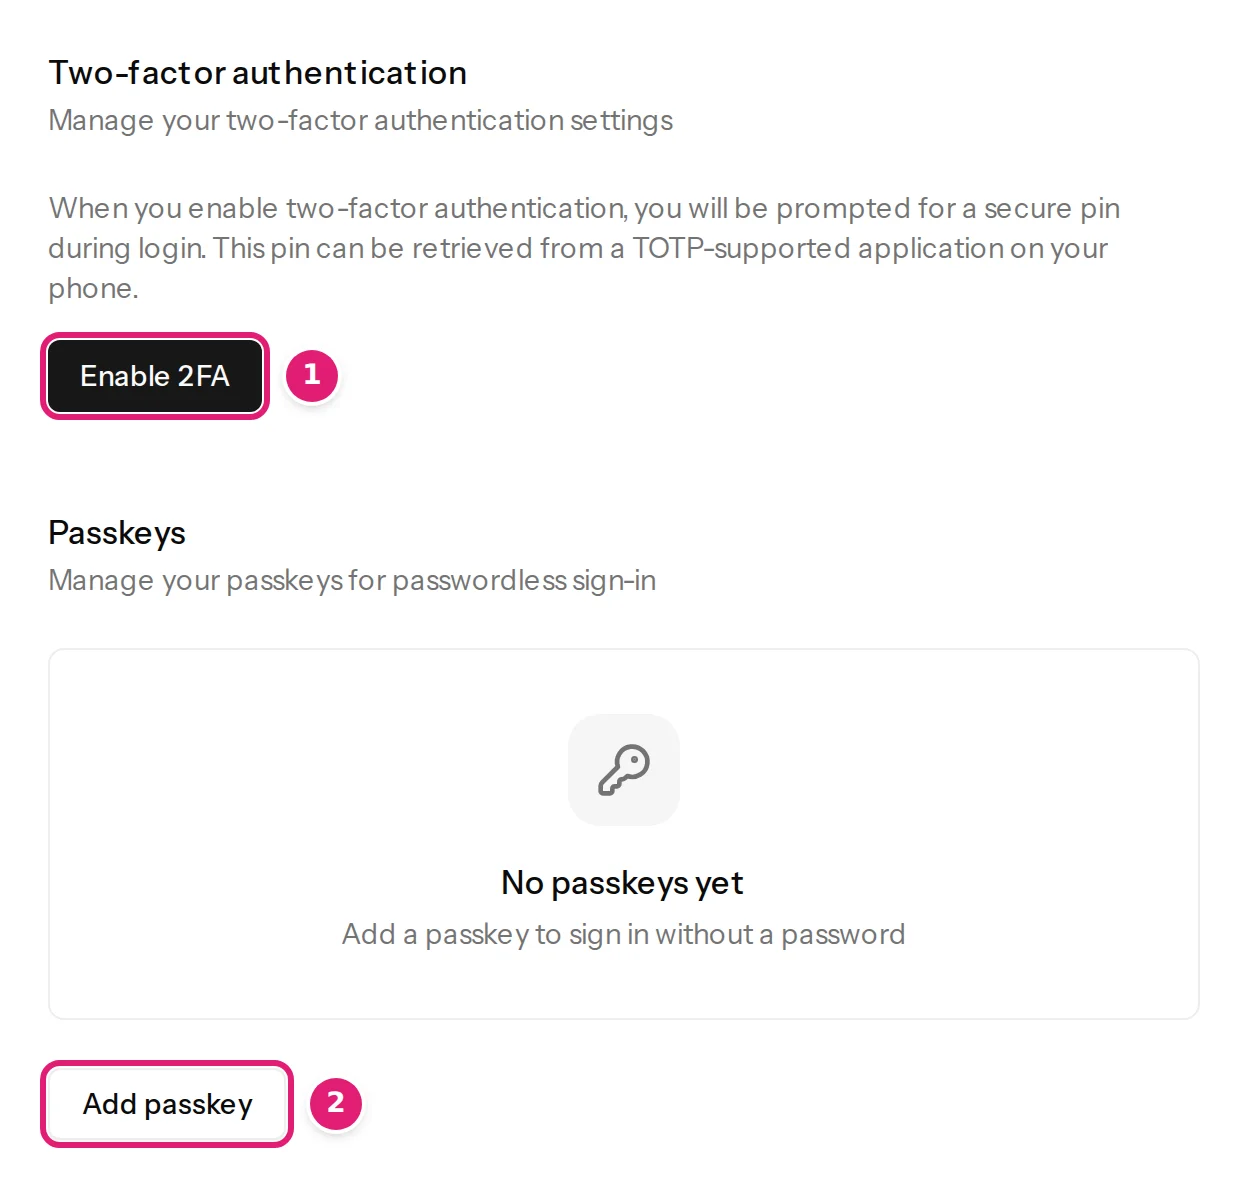
To turn it on
- In Settings → Security, select Enable 2FA (1).
- In the window that opens, scan the QR code with your authenticator app, or enter the setup key by hand. Select Continue.
- Enter the six-digit code the app shows under Verify authentication code. The window confirms it as soon as you have entered the sixth digit, and Confirm does the same. Two-factor authentication is only on once you have confirmed a code.
- Keep the recovery codes: select View recovery codes and store them in a password manager. Each code works once and is removed when used. Regenerate codes replaces the whole set.
To turn it off, select Disable 2FA on the same page.
Passkeys#
A passkey lets you sign in with your device's own unlock (fingerprint, face, screen lock or a security key) instead of typing a password.
- In Settings → Security → Passkeys, select Add passkey (2).
- Give it a name that tells you which device it is, such as MacBook Pro or iPhone, and select Register passkey. Your browser then asks you to confirm with your device.
- To sign in later, select Sign in with a passkey at the top of the sign-in page.
Each passkey is listed with when it was added and last used. Remove takes a passkey away; you can no longer sign in with it. If your browser does not support passkeys, the page says Passkeys are not supported in this browser.
Signing in with Google, GitHub, Microsoft or GitLab#
When the sign-in page shows buttons under Or continue with, you can sign in with that provider instead of a password.
- The first time, signing in with a provider creates your account and a workspace. You accept the Terms of Service afterwards, as everybody does.
- If you already have an account with the same email address, the provider joins it only when the provider vouches for that address (Google, GitHub and GitLab do, for an address they have verified). When it does not, which is always the case with Microsoft, Content Uploader emails a Confirm sign-in link to the address of the existing account. It works for 30 minutes and only in the browser where you started. If you would rather not wait for it, sign in with your password or passkey and connect the provider under Security; Content Uploader says so with An account with this email address already exists. Sign in with your password or passkey, then connect the provider in your security settings.
- To add a provider later, open Settings → Security → Connected accounts and select the provider's button. Disconnect (the bin icon) removes it. You cannot disconnect the last way you have to sign in.
- A provider account can belong to one Content Uploader account only. Otherwise the page says That provider account is already connected to a different Content Uploader account.
- If a provider cannot give Content Uploader a verified email address, the page says We couldn't get a verified email address from the provider. Add and verify one there, or sign up with your email instead.
- Two-factor authentication is still asked after a provider sign-in.
Recent activity#
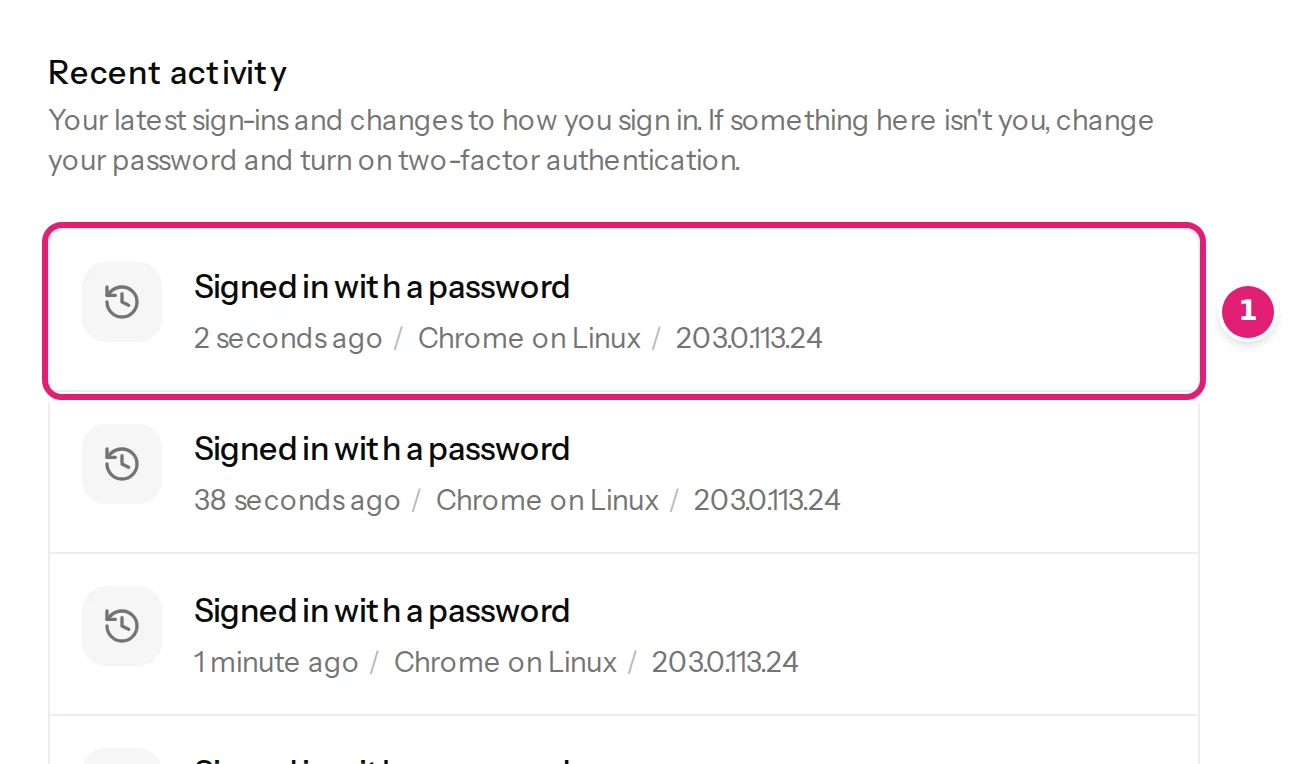
The bottom of Settings → Security lists your latest sign-ins and changes to how you sign in: Signed in with a password, a passkey or a provider, a changed password or email address, two-factor authentication turned on or off, and so on. Each entry shows when, the browser and the IP address. The newest 20 are listed; the browser and IP address are erased after 12 months. If an entry is not you, change your password and turn on two-factor authentication at once.
If you cannot sign in#
Cannot sign in lists the messages you may see and what each means.
Was this article helpful?
Related articles
- Account and workspaceYour account settingsWhere to change your name and email address, your password and sign-in methods, the look of the app and your cookie choices, and where to delete your account.
- Getting startedCreating an accountHow to sign up for Content Uploader with an email address or an identity provider, verify your email and land in your new workspace.
- TroubleshootingI cannot sign inWhat to do when sign-in fails: wrong credentials, too many attempts, a locked account, a refused two-factor or recovery code, or a passkey or provider sign-in problem.
- Account and workspaceWorkspaces, owners and the workspace switcherWhat a workspace is, what belongs to it, how to move between several workspaces, and what the notices about a paused, suspended, locked or deleted workspace mean.