Installing the WordPress plugin
Install the Content Uploader plugin from the WordPress plugin directory, or upload the ZIP from the Sites page, and activate it.
- WordPress
- 3 min read
- Updated October 14, 2026
Installing the plugin sends nothing to Content Uploader. It only adds a settings screen to your site. The connection starts later, when you select Connect to Content Uploader and approve it (next article).
Before you start: check the requirements, and sign in to WordPress as an administrator.
Two ways to install it#
The plugin is called Freakedout Content Uploader CSV & Excel Import. Install it in one of two ways; both give you the same plugin, and WordPress offers its new versions either way (updating the plugin).
- From the WordPress plugin directory, like any other plugin. This is the quickest way.
- From a ZIP file that you download in Content Uploader and upload to WordPress. Use it when your site cannot install plugins from the directory.
Install it from the plugin directory#
- In WordPress, open Plugins → Add Plugin.
- Search for Freakedout Content Uploader CSV & Excel Import.
- On the plugin's card, select Install Now, then Activate.
Or upload the ZIP file#
1. Download the plugin#
-
In Content Uploader, open Sites in the sidebar.
-
In the Connect a WordPress site box, select Download plugin ZIP.
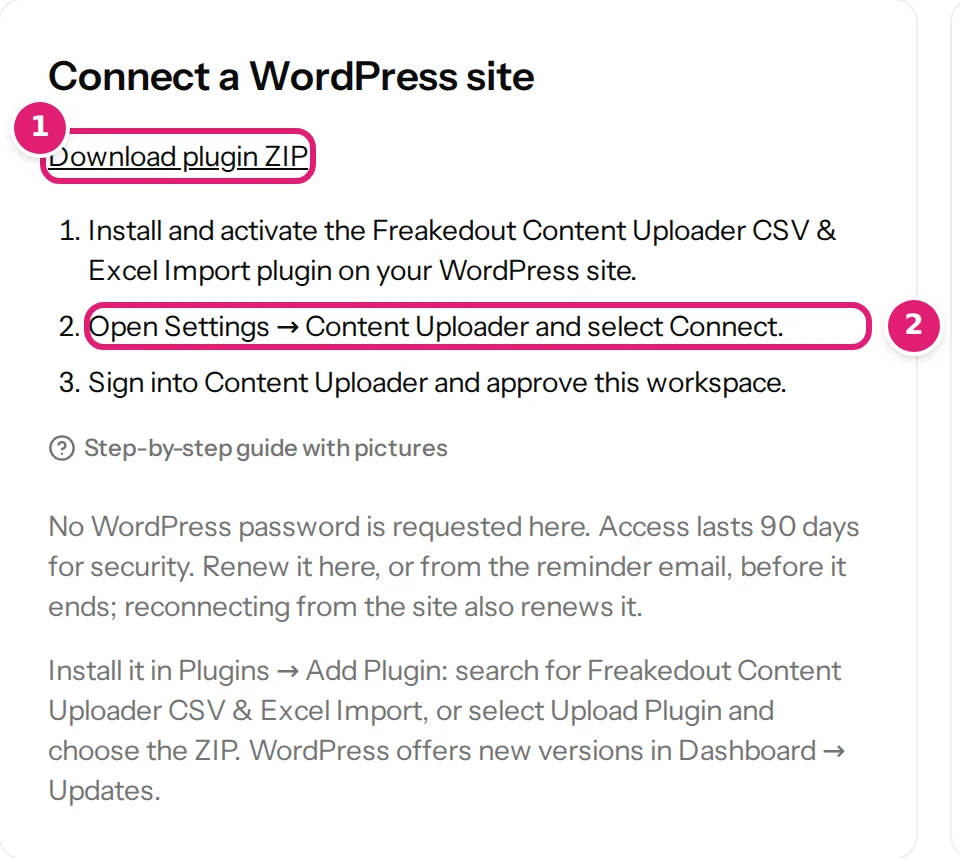
The download link is on the Sites page. Keep the ZIP file as it is: do not unzip it.
The file is named freakedout-content-uploader-csv-excel-import- followed by its version number. Keep it as a ZIP file.
2. Upload it in WordPress#
-
In WordPress, open Plugins → Add Plugin and select Upload Plugin at the top of the page.
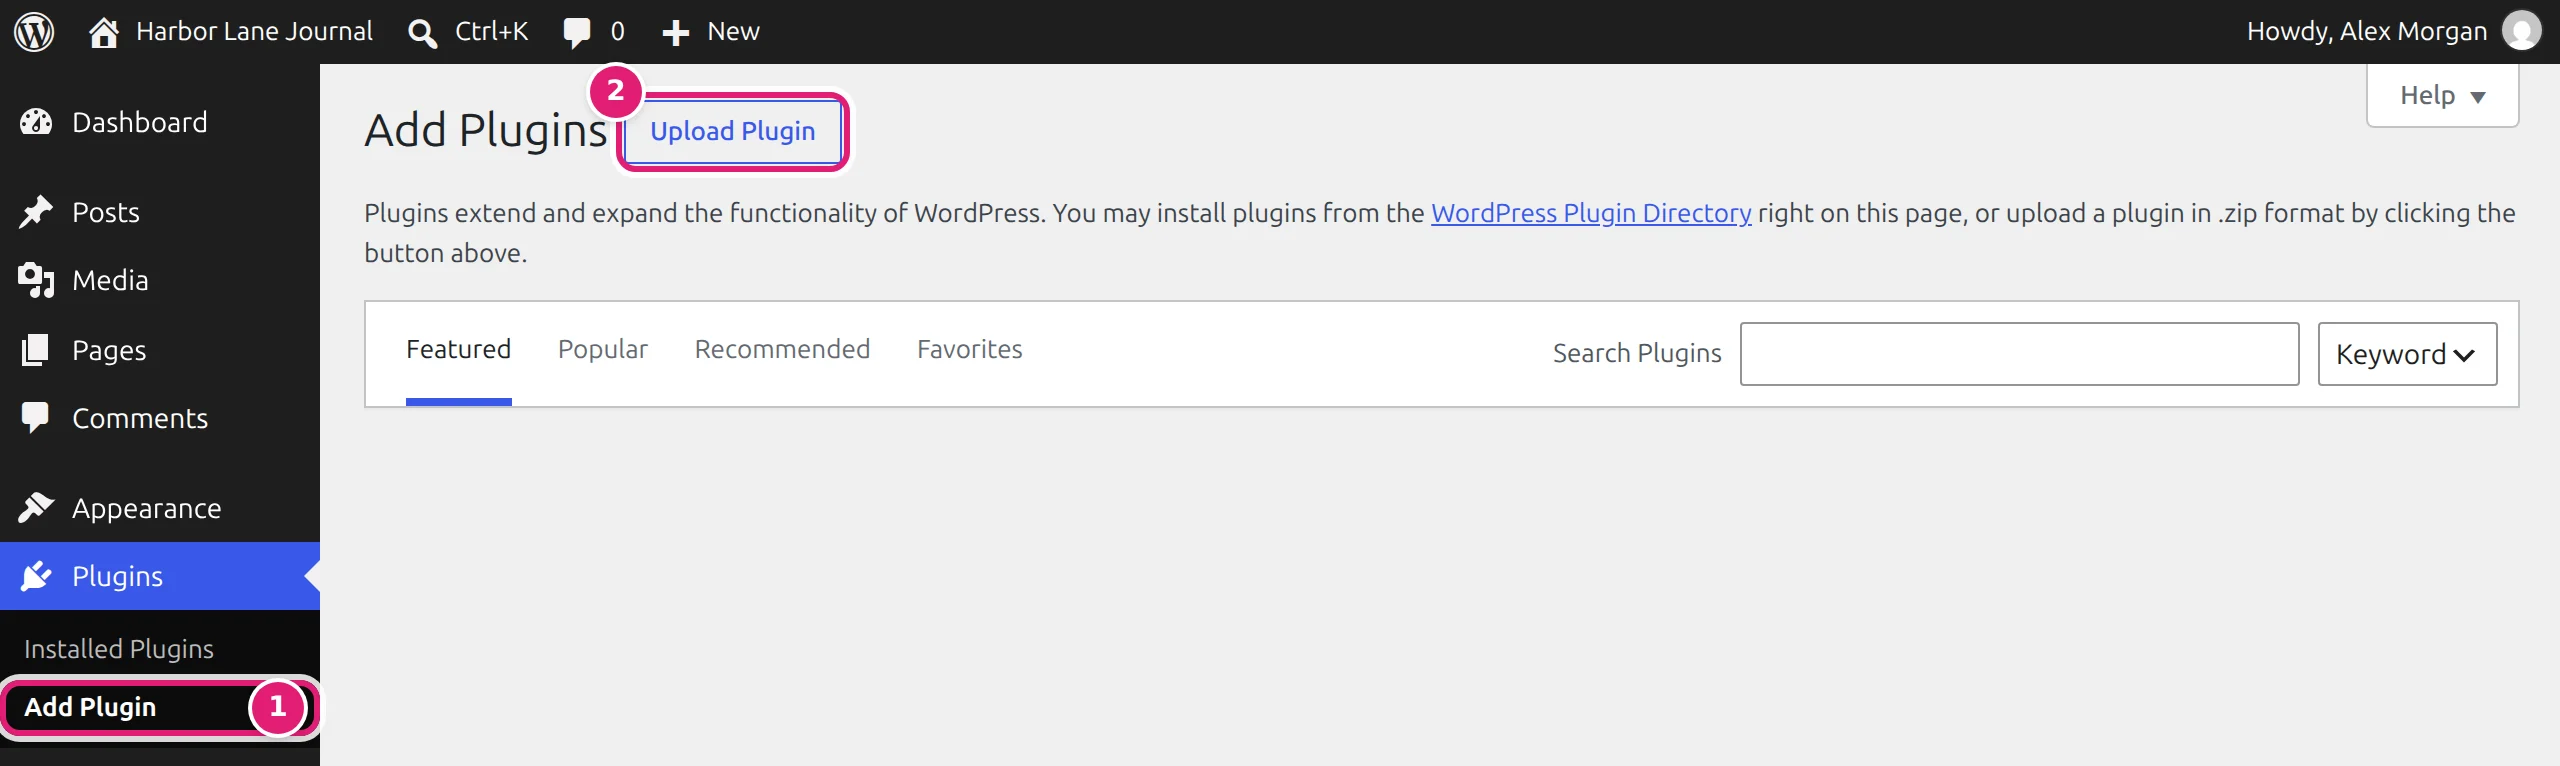
Plugins, then Add Plugin, then Upload Plugin. -
Choose the ZIP file and select Install Now.
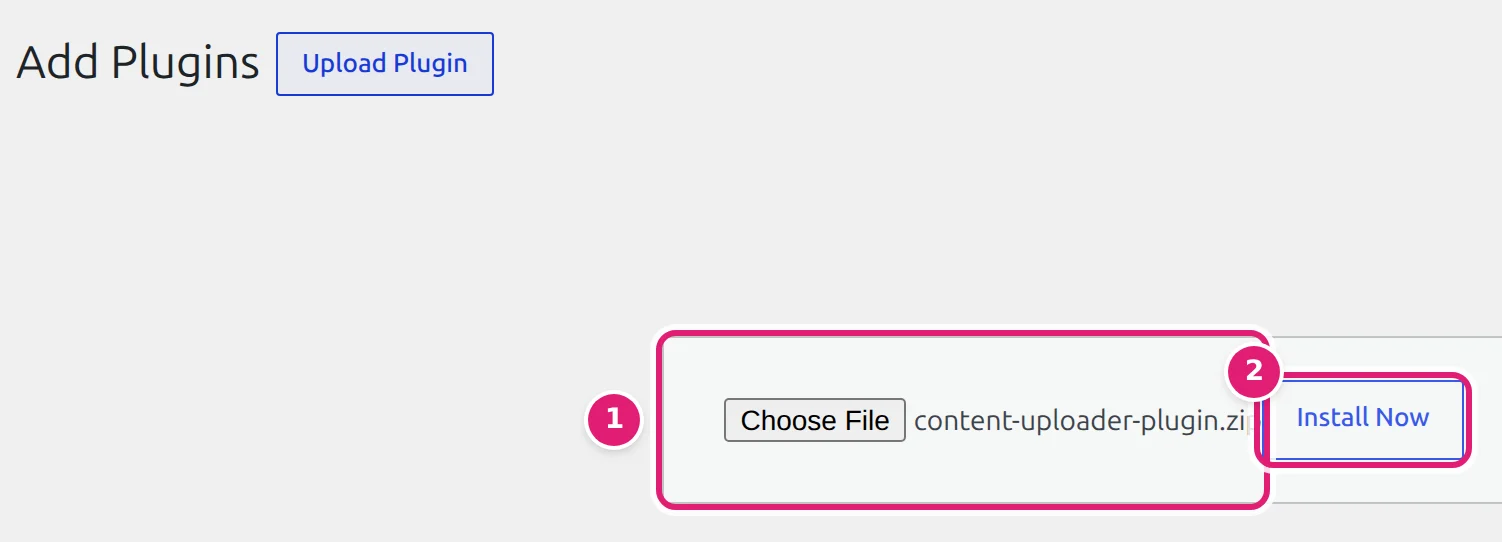
Choose the downloaded file, then install it. -
When WordPress says the plugin installed successfully, select Activate Plugin.
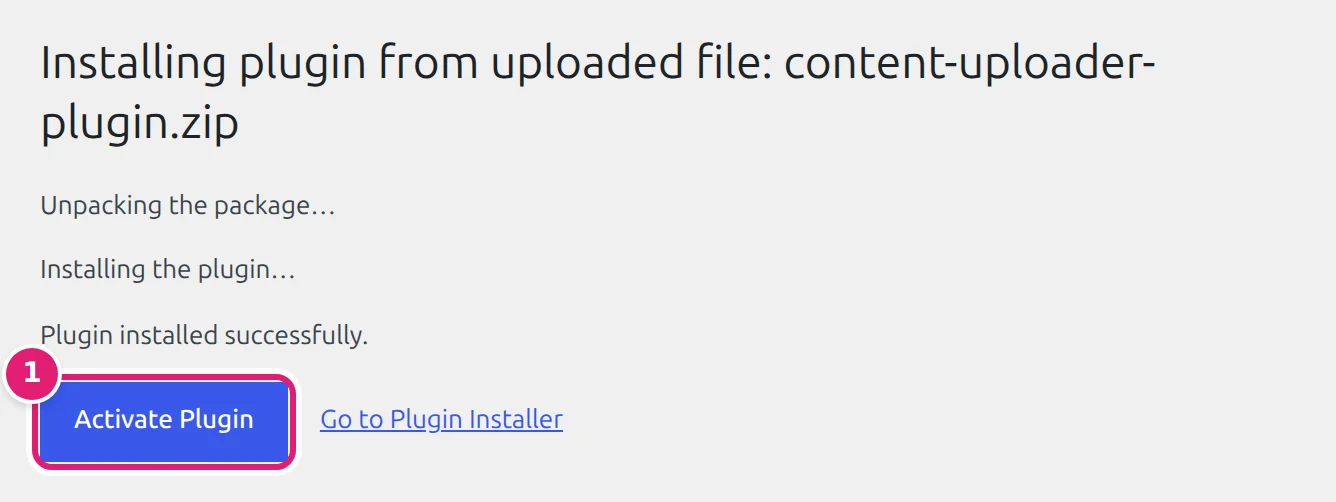
Activate the plugin straight away. -
WordPress shows Plugin activated. and the plugin in the list.
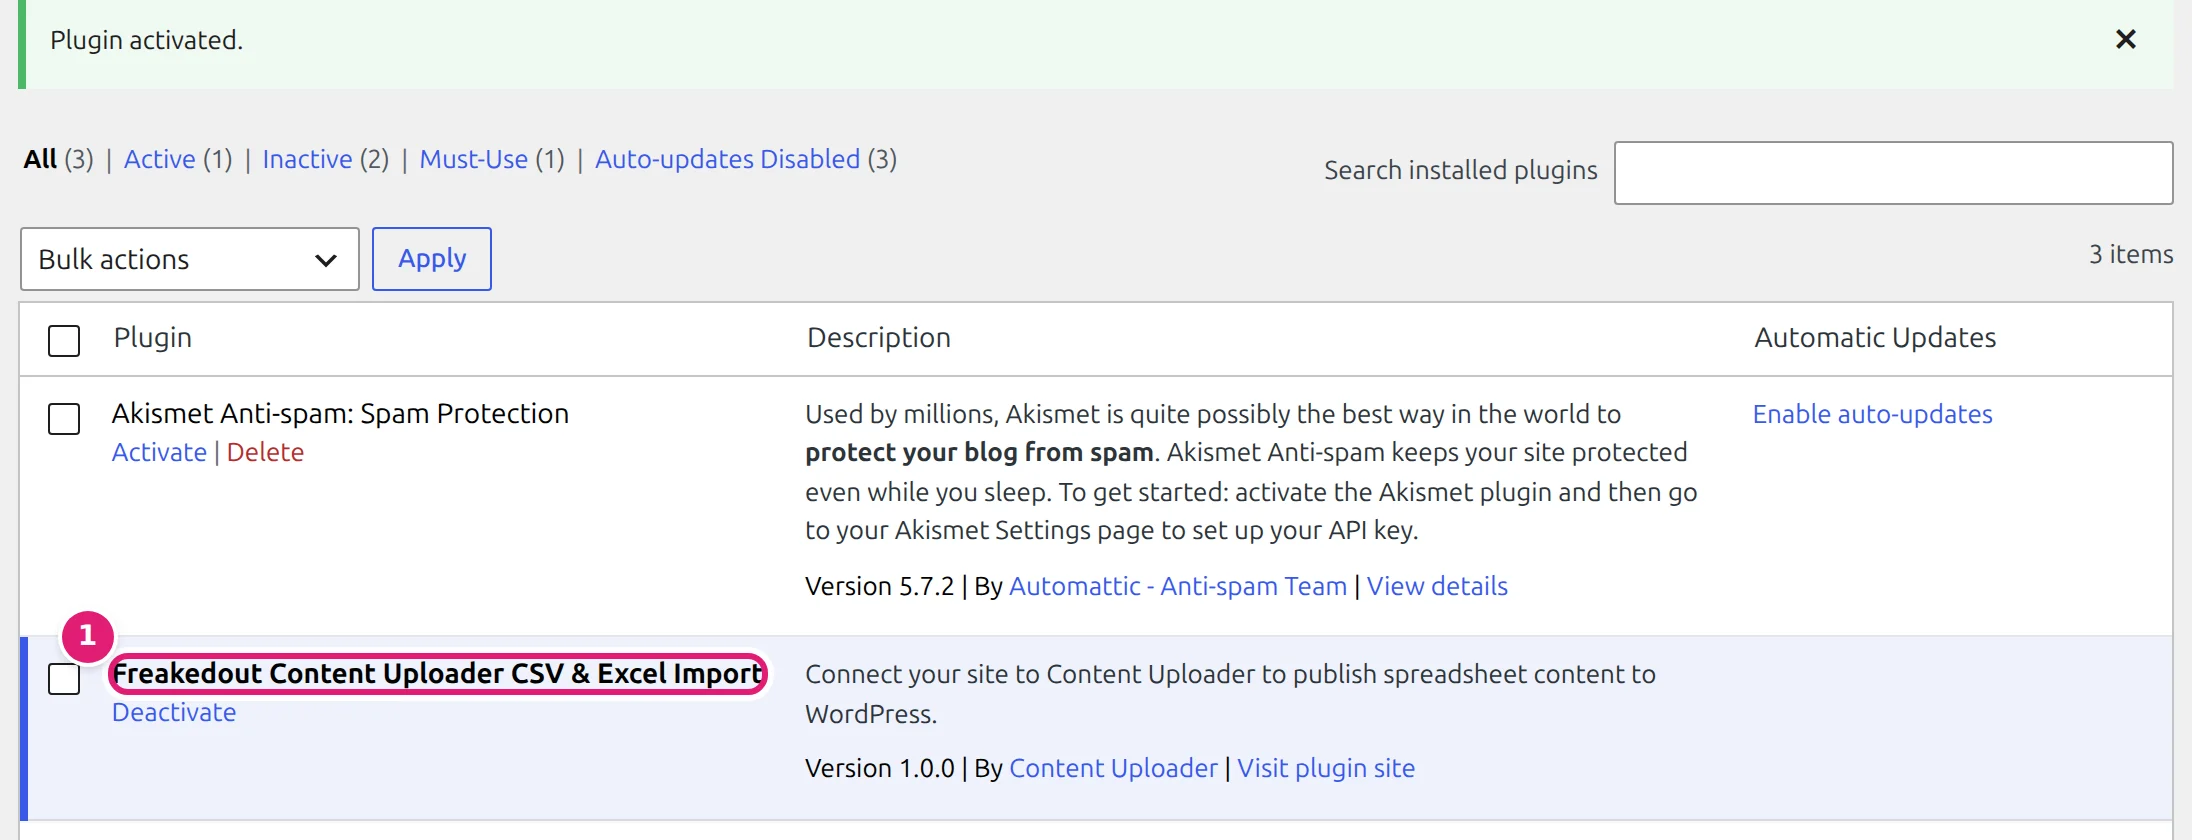
The plugin is now installed and active.
What you should see#
A new entry, Content Uploader, under Settings in the WordPress menu. If it is missing, the plugin is not active: check the Plugins list.
Common mistakes#
- Unzipping the file first. WordPress needs the ZIP itself.
- Installing on a multisite network. The plugin refuses to activate there (requirements).
- A red notice asking you to deactivate and delete an earlier plugin. An earlier version of the plugin, under another name, is still active. Deactivate and delete it in the Plugins list. What was imported stays, with its history, and you connect the site once more.
- A message that the file is too large or the upload failed. The plugin is only about 30 KB, so the size is not the problem: ask your host whether uploads to WordPress are being blocked, or install the ZIP by FTP into
wp-content/plugins/.
Next: connect your site.
Was this article helpful?
Related articles
- WordPressConnecting your WordPress siteStart the connection from WordPress, sign in to Content Uploader and approve the workspace. No WordPress password is ever entered in Content Uploader.
- WordPressWordPress requirements and compatibilityWhat your WordPress site needs before you connect it: version, PHP, HTTPS, a reachable address, permissions and the things that block a connection.
- WordPressUpdating the WordPress pluginHow to update the Content Uploader plugin, how to know whether your version is current, and what the "plugin is outdated" message means.
- Getting startedConnect your first websiteChoose WordPress or Joomla, install Content Uploader's connector on your site and approve the connection. It takes about five minutes and changes nothing on your site.