Installing the Content Uploader Connector in Joomla
Download the connector package from the Sites page and install it in Joomla under System, Install, Extensions. What you should see afterwards and what to check if it fails.
- Joomla
- 3 min read
- Updated October 13, 2026
The connector is an ordinary Joomla extension package. Installing it sends nothing to Content Uploader; it only adds a connection screen to your site. The connection starts later, when you select Connect to Content Uploader and approve it (next article).
Before you start: check the requirements, and sign in to Joomla's administration as a Super User (or another user who may manage extensions).
1. Download the package#
-
In Content Uploader, open Sites in the sidebar.
-
In the Connect a Joomla site box, select Download package ZIP (it shows the version number). Keep it as a ZIP file; do not unzip it.
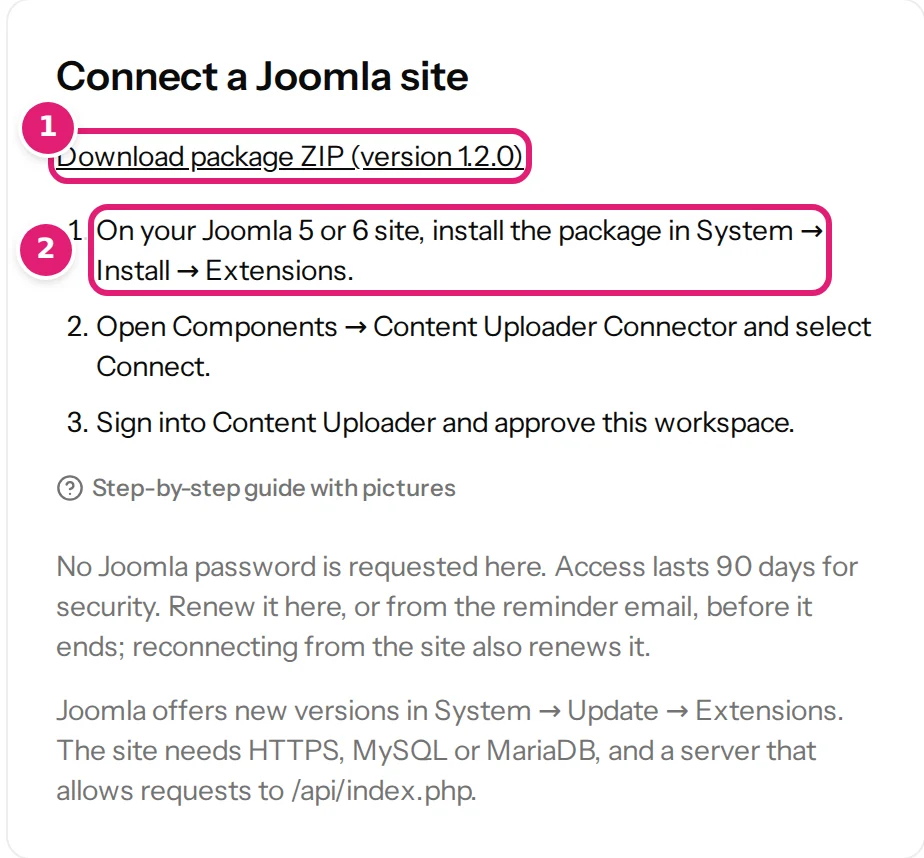
The package is on the Sites page. The version is part of the link.
The file is named pkg_cuconnect- followed by its version number and is a few dozen kilobytes. You can also download the latest release from the public page at /joomla/connector. Joomla's installer shows a Maximum upload size on this screen; the package is far below any normal limit.
If the box says No package has been released yet., there is nothing to download yet: the package becomes available when a release is published.
2. Install it in Joomla#
-
In Joomla's administration, open System → Install → Extensions.
-
On the Upload Package File tab (1), drag the ZIP into the box or select Or browse for file (2).
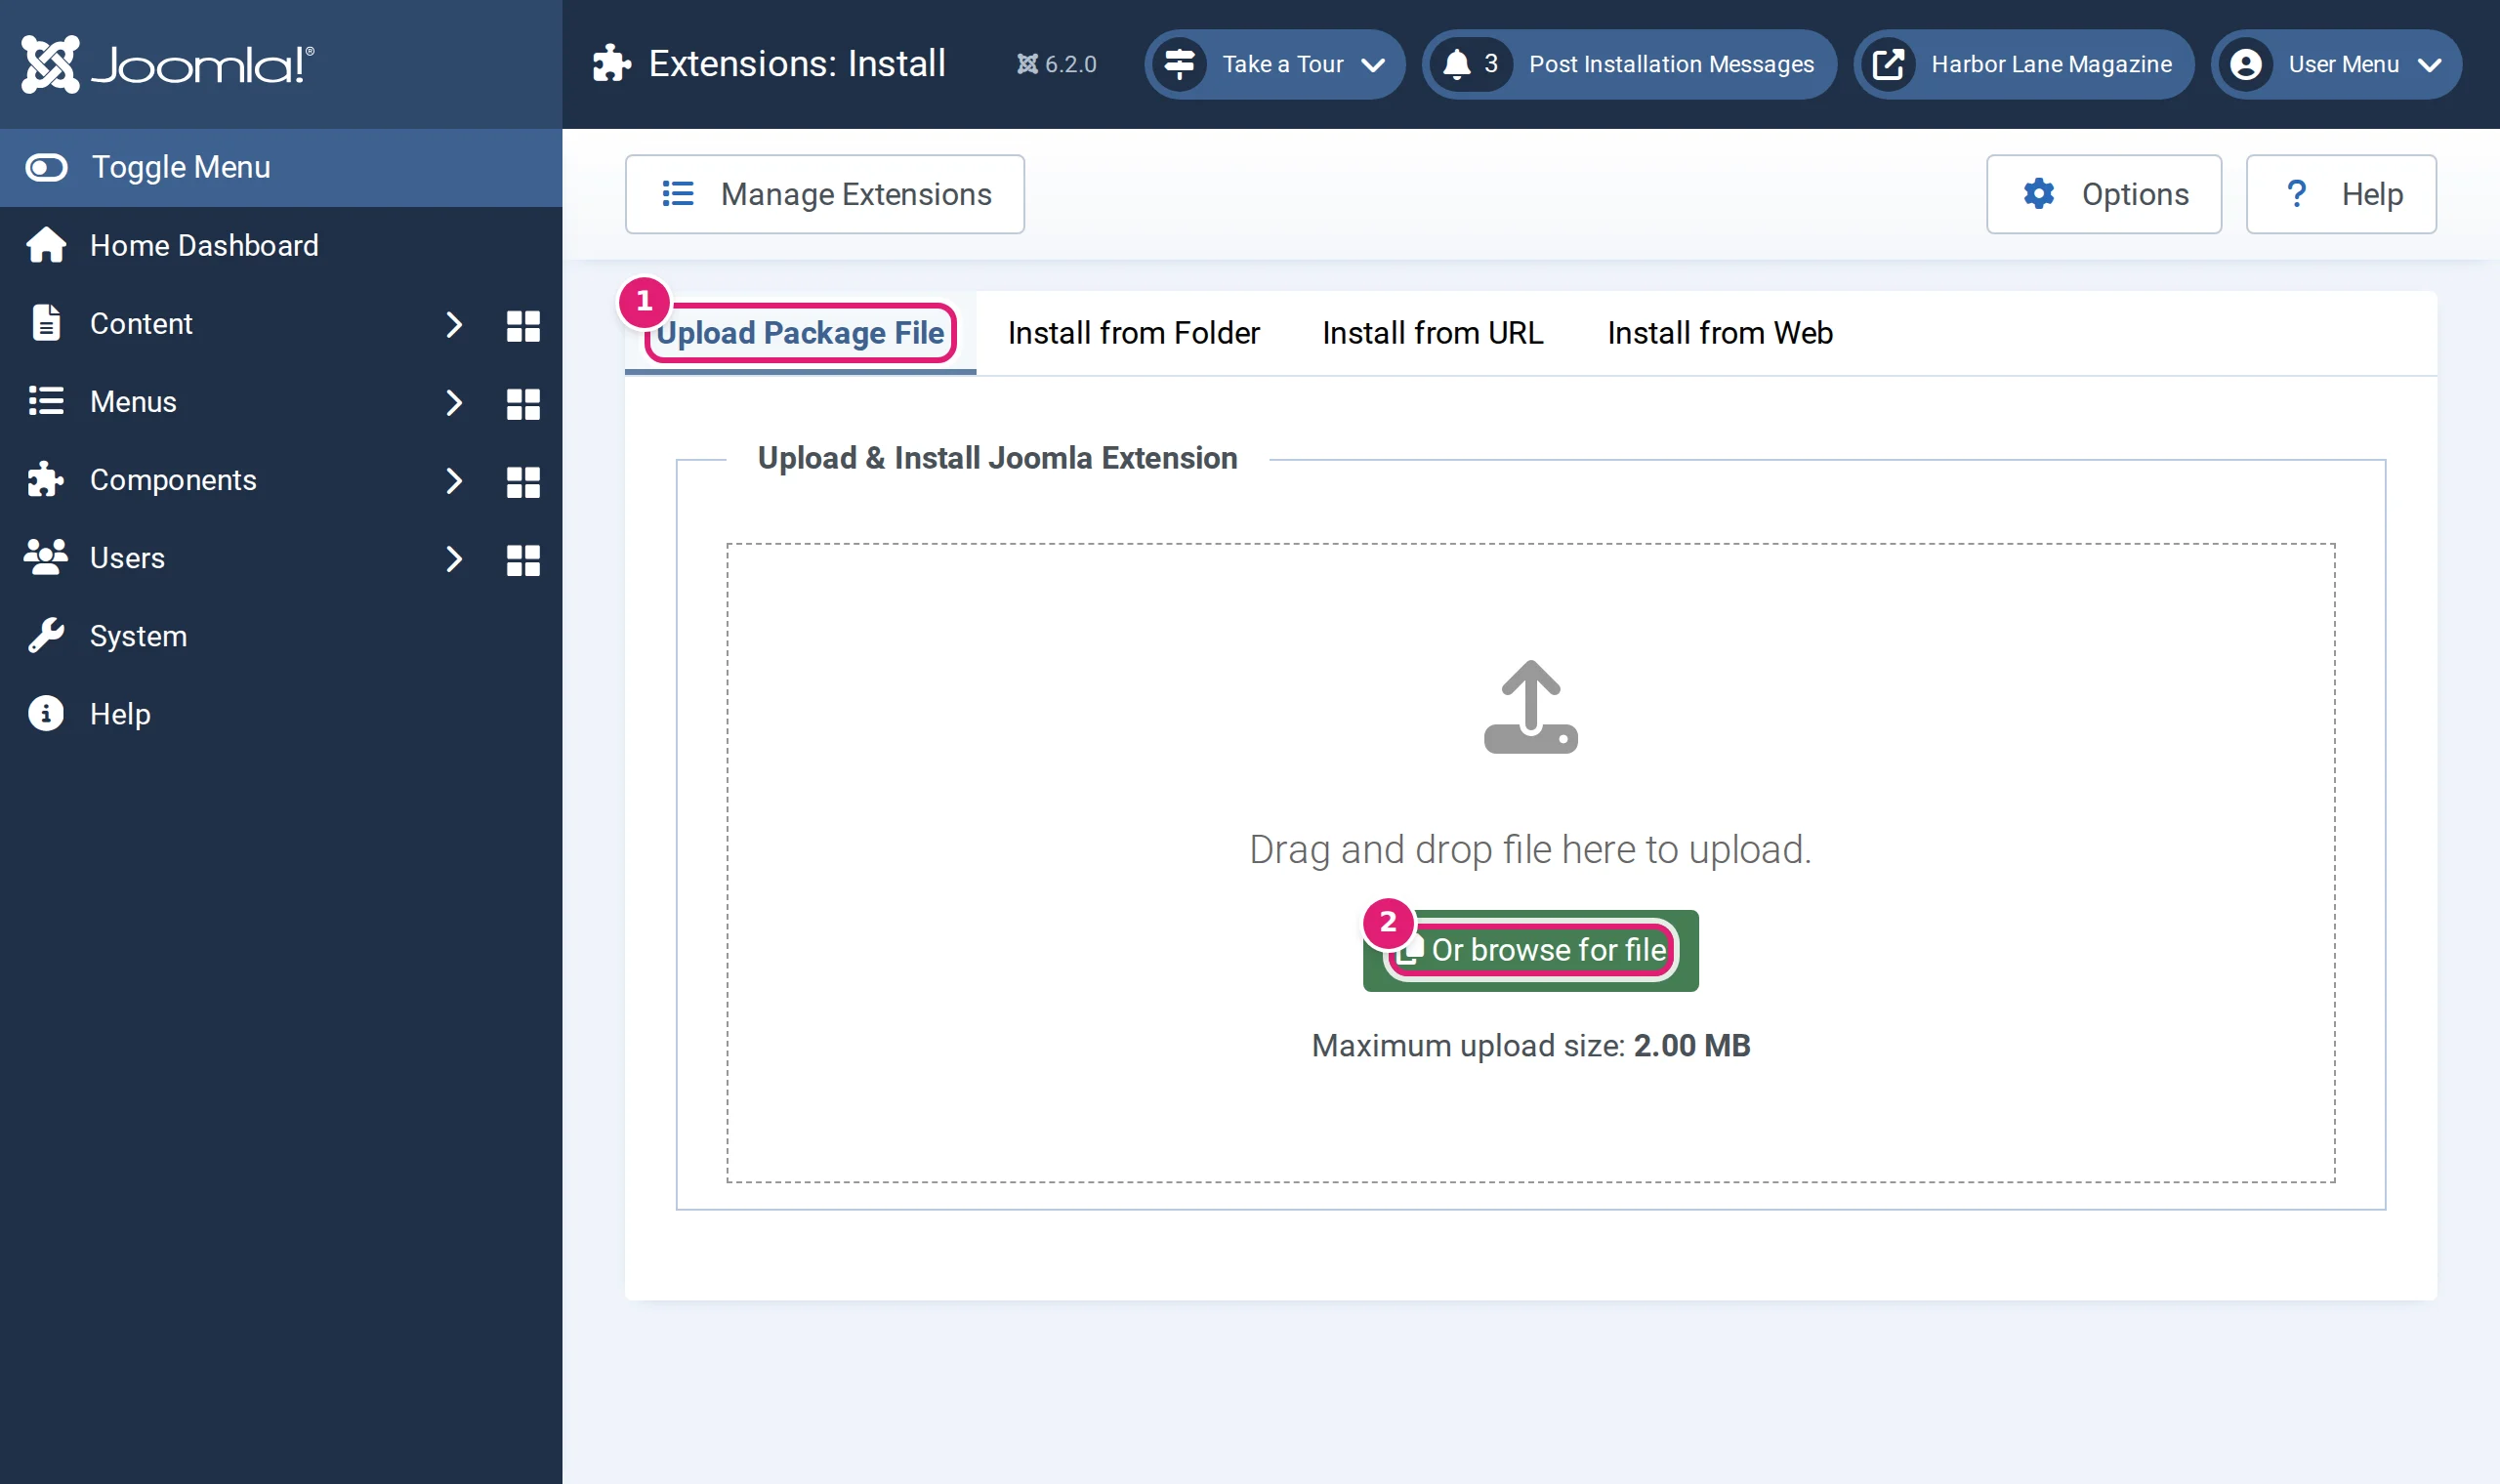
System, Install, Extensions: upload the package. -
Joomla installs it and shows Installation of the package was successful. with a note: Next, connect this site to Content Uploader and choose the account it publishes as in Components → Content Uploader Connector.
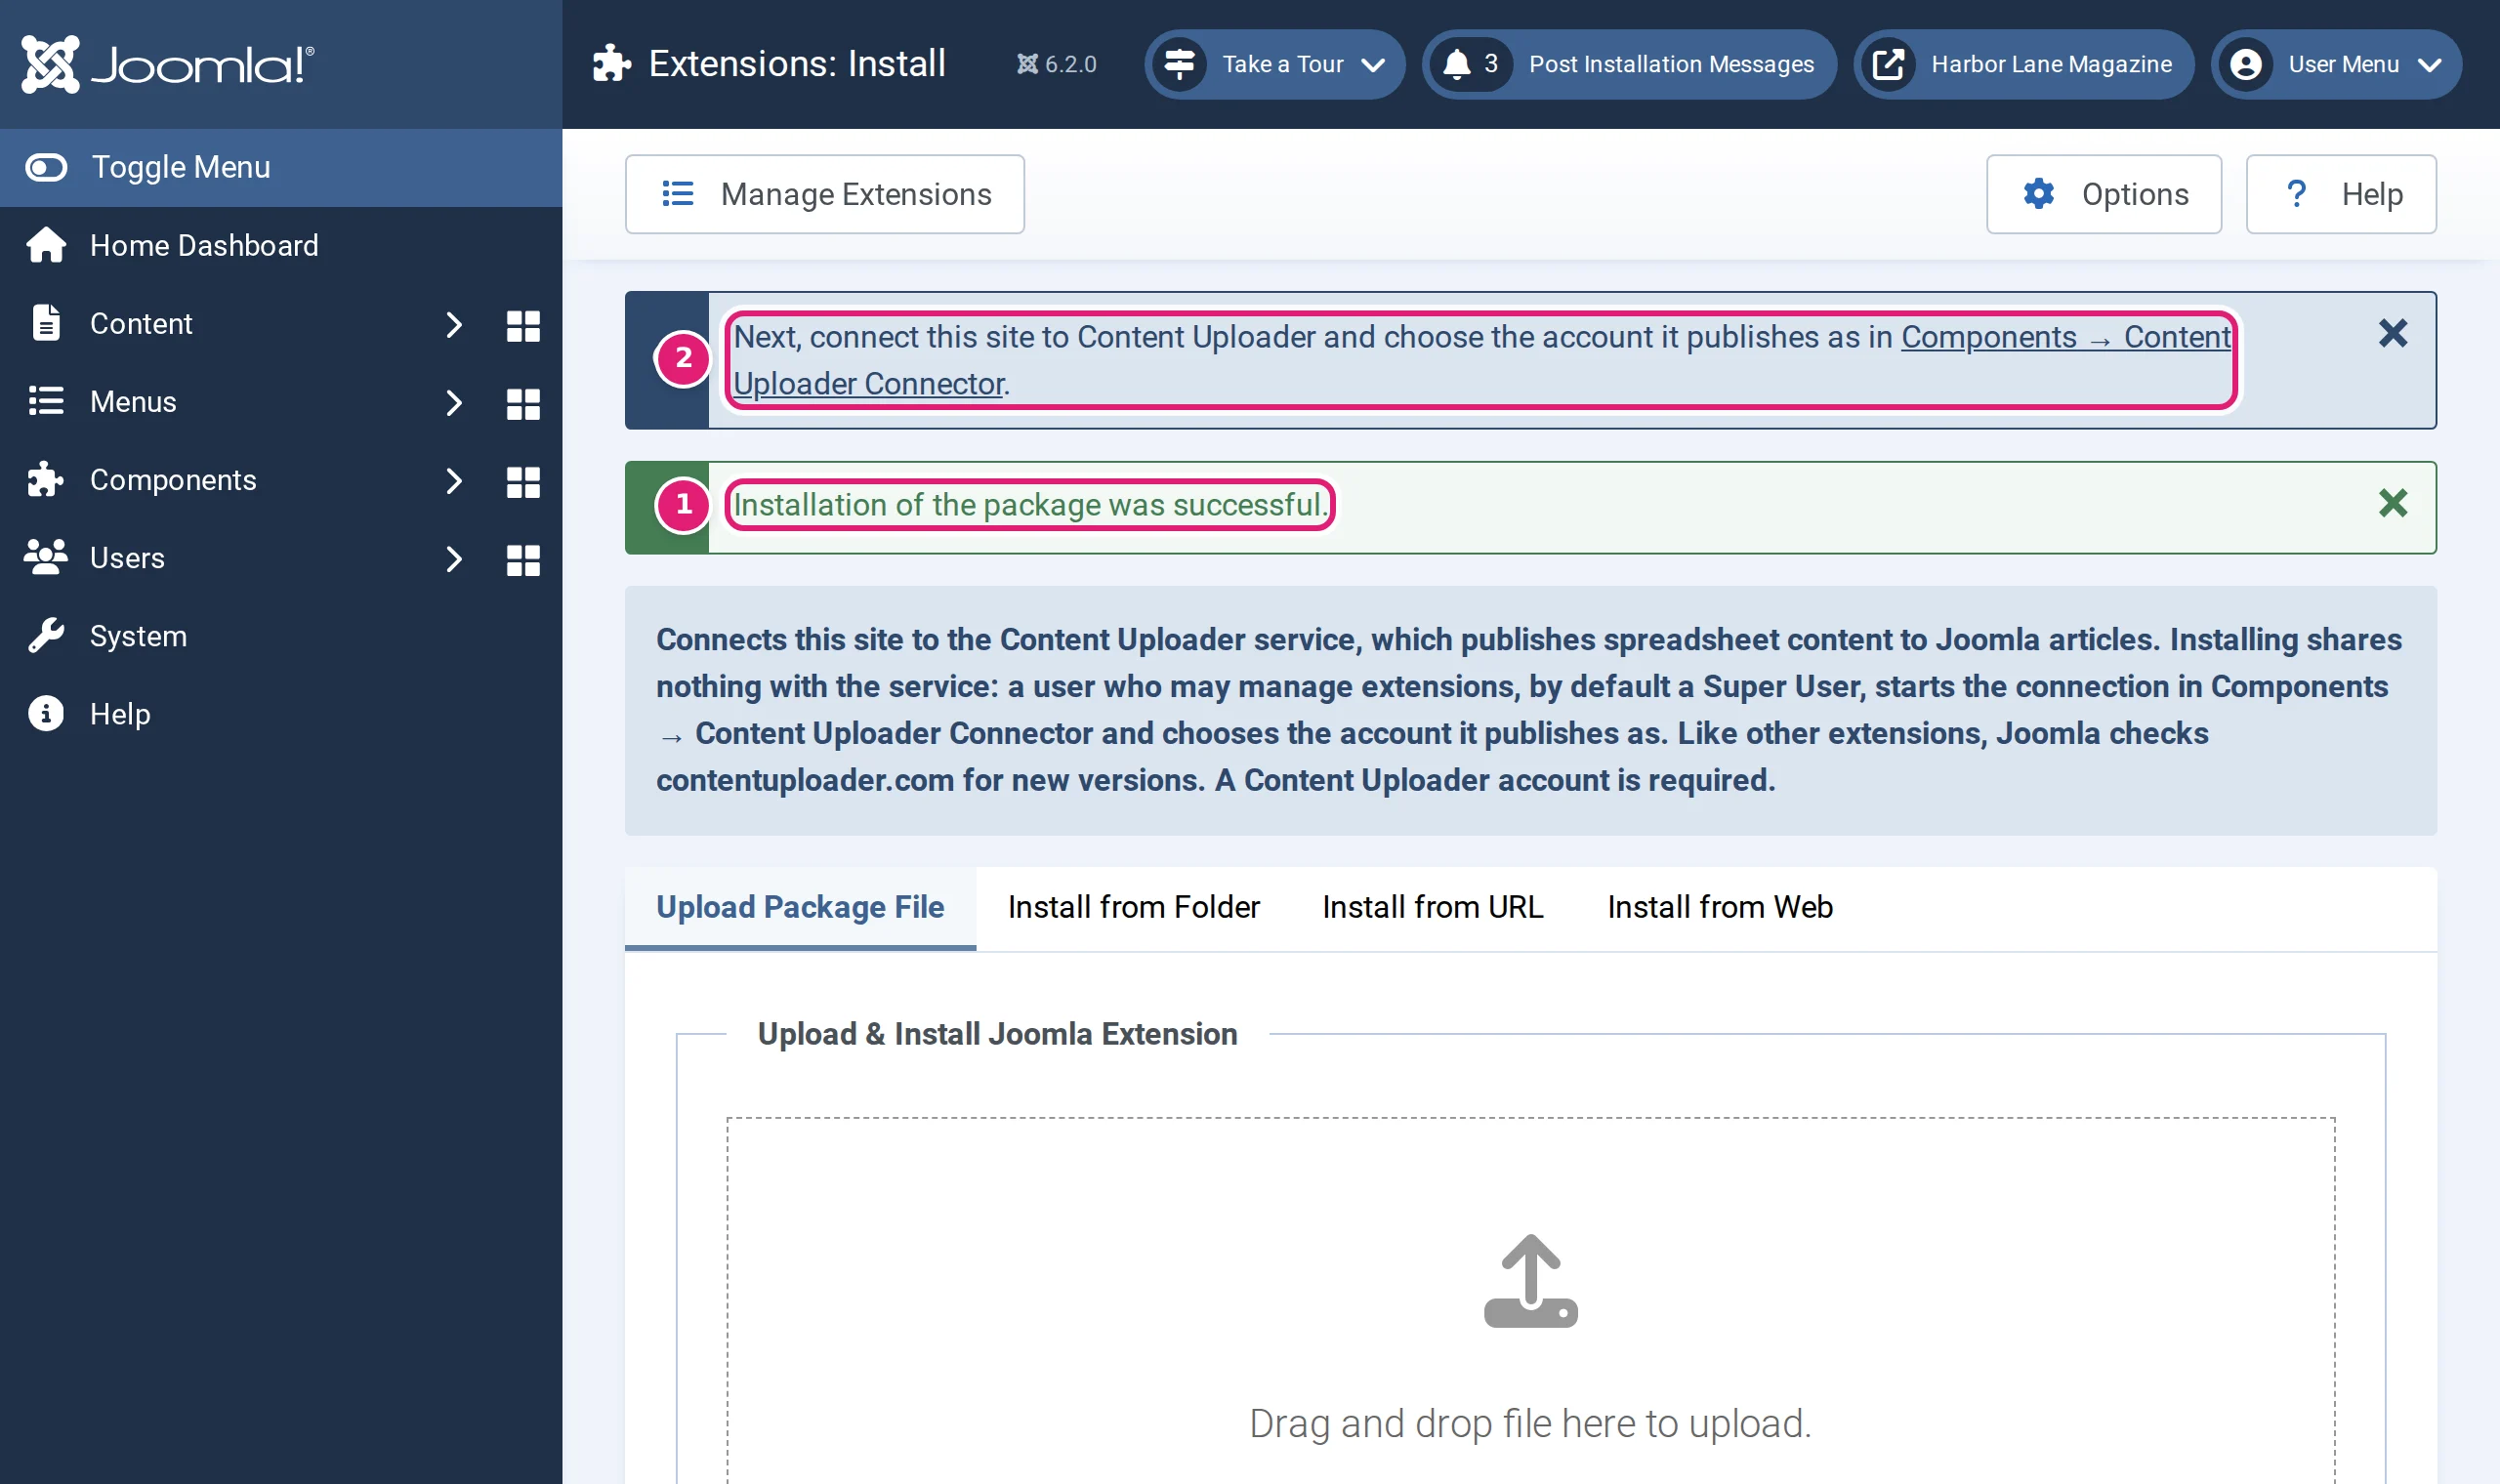
The package installed. The note links to the connection screen.
The installer also enables the web services plugin that the connector needs. You do not have to switch anything on by hand.
What you should see#
A new entry, Content Uploader Connector, under Components in the Joomla menu. If it is missing, the package did not install: look for an error message at the top of the Install page.
If Joomla refuses the package#
The installer checks the site first and installs nothing if it cannot work safely:
- Content Uploader Connector needs Joomla 5 or 6. The site runs an older Joomla. Update Joomla first.
- Content Uploader Connector needs PHP 8.1.0 or later. Ask your host to switch the site to a newer PHP version.
- Content Uploader Connector supports sites on MySQL or MariaDB only. The site's database is PostgreSQL.
If the upload itself fails (no message, or a size error), your host's PHP upload limit is the usual reason; the alternatives are Install from Folder (put the unzipped folder on the server first) and Install from URL with the link from the public download page.
Common mistakes#
- Unzipping the file first. Joomla needs the package ZIP itself.
- Installing the single extension files from inside the package. Install the package ZIP only; it contains the component and the plugin together.
- Disabling the web services plugin later. The connection then stops working and Joomla's API answers 404 or 406. Enable Web Services - Content Uploader Connector again in System → Plugins.
Next: connect your site.
Was this article helpful?
Related articles
- JoomlaJoomla requirements and compatibilityWhat your Joomla site needs before you connect it: Joomla 5 or 6, PHP, MySQL or MariaDB, HTTPS, a reachable /api/index.php, and who may connect it.
- JoomlaConnecting your Joomla siteStart the connection from Joomla, choose the account that publishes, sign in to Content Uploader and approve the workspace. No Joomla password or API token is entered there.
- JoomlaUpdating the Joomla connectorSee which connector version your site runs, update it with Joomla's updater or by installing the new package, and check the result. Your connection and mappings carry over.
- JoomlaTroubleshooting the Joomla connectionFixes for a Joomla site that cannot connect: expired invitation, revoked access, a disabled web services plugin, a blocked /api/index.php or a broken publishing account.